How To Make Jam
Jam Making Recipes
There are literally thousands and thousands of different fruit jam and preserve recipes available, although all follow roughly the same methods.
All fruit should be clean. If you are washing your fruit, ensure that it has been fully dried before using. Underripe fruit is preferable, as it contains higher levels of pectin and will therefore produce a jam that sets easier.
Before starting, you should put several saucers into a freezer to chill, so that these cold plates can be later used to test if your jam mixture has reached its natural 'setting point'.
Dissolving the Sugar and Cooking the Fruit
Place all of your ingredients into a large saucepan (fruit, sugar and possibly lemon juice) and place the pan on a low heat. As the pan begins to warm up, the liquid in the fruit is released and the sugar starts to dissolve. Give the pan a little shake every now and then, to assist the dissolving process, and occasionally stir.
If possible, avoid stirring the mixture too much, as you will start to break up the fruit as it begins to cook. This is a gradual process and should not be rushed by turning up the heat, which will likely result in the sugar quickly burning. Of note, some recipes may stipulate that the sugar should be added part-way through the cooking process, rather than right at the beginning.
Check that all of the sugar has been completely dissolved by scraping a wooden spoon around the side and bottom, and then carefully examine the liquid on the spoon. Once you are confident that no sugar crystals remain in the mixture, you can allow your jam to begin boiling. Boil the mixture for roughly four or five minutes (this may be longer for some recipes) and remove the pan from the heat.
Checking for the Setting Point and Storage
Spoon a small amount of the hot jam mixture onto one of the chilled plates. Leave for around one minute and if a skin begins to set when you run your finger through this cooling mixture, with 'wrinkles' being clearly present, then your jam has started to set. If not, return your pan to the heat and continue to simmer the mixture, testing in this way every few minutes until you find the jam's setting point.
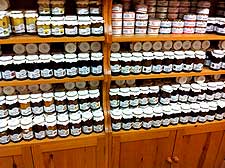
Once your jam is ready to set, you can carefully spoon off any scum, or mix in a small piece of butter to help disperse the scum. Spoon or pour your jam into freshly washed, sterilised glass jars. A special jam funnel may be very useful at this stage, preventing the possibility of spillage and mess. It is important that wax discs (wax side facing downwards) are added while the jam mixture is still hot, so that the wax will melt and provide an effective seal.
Finally, label your jars once they have properly cooled down and store them in a dry, cool cupboard, ready to be used. Jams made in this way should have a shelf life well exceeding a year, provided that there is a fairly high 'sugar to fruit' ratio (at least 50:50). However, once opened, the preserve should be stored in a fridge and eaten within a few weeks.